Search This Blog

Friday, April 26, 2013

Using a Classroom Website and Blogging weekly

I had never really considered using a classroom website outside of what my school absolutely required. Part of this came from a rather lackluster experience with them as a high schooler. Teachers did not update their class website and the format they required was difficult to navigate. So checking classroom websites was difficult an inaccurate, not to mention a little pointless, as teachers never updated them. I did have one teacher that had a really intense classroom website. It was so large it was difficult to navigate, but it did have good information on it. However, the school required her take it down so that she could use the school server. She was so frustrated she never updated her new website.

Ms. Biven's class website
The other reason I had steered away from using a classroom website was that not all students have access to technology at home. I still struggle with this. I never want to intentionally widen the gap between the privileged and those who are not. However, another professor gave me some good advice. He essentially said that if I do not give any of my students access to technology, I hurt them as a whole.

So I intend to use a class website for support services. Hopefully, I will be able to work in an environment where all students have access to technology, as I am interested in flipping the classroom. I would like to send students home with lectures and then use class as a time to do more interesting supportive activities that promote critical thinking. To do this students need access to technology.


I also like blogging, for the most part. I would like to create another blog in the future about becoming a teacher so that I can network with other, more veteran teachers. Especially since I am likely moving out of state and away from the teachers who I have worked with, it might be a good way to tap the brains of people from a distance.


Friday, April 19, 2013

Lights, Camera, Action

I actually really enjoy using iMovie. It is not a difficult program to learn to use well, and I had previous experience with it. We have to film all our video blogs (vlogs) using iMovie, which means I've had to use the program to film myself and post videos regularly for the past two or so years. It was challenging at first, but not too bad after the first time or two. I also used iMovie for all the videos on my class website. So essentially all my previous experience in iMovie centered around filming myself and uploading to YouTube.

One of my vlogs:
http://www.youtube.com/watch?v=Lzs0OT97qhY

I also really enjoyed being able to incorporate my own photos into the classroom. I know my kids that I teach now really get a big kick out of hearing about my life as a "normal person" as opposed to a teacher who lives at school. So I think they will enjoy the photos I put in there of me. I also think using photos of myself allows me to model what "real-life" experiential learning looks like, gives me credibility, and helps make abstract places more concrete. My only regret is that some of my...finer...photos could not make it in the video, for they are not educational in nature. So I will put them here for your enjoyment.


Note: I did try to get iMovie to embed in the blog, but after about an hour of "waiting to upload" I gave up. 

A few things I learned on this project: I was shocked by how well stills work in this format. Before I really only had worked with actual video, but photos work well. I also learned how to make transitions work much better than before. Using audio was much easier than I expected, as well.

The only problem I see is that making this work for a deaf classroom could be challenging. Captions are an option, but the space for text is so small, and there's no way to have it really "scroll" exactly with the words. It is possible to have words scroll, but not necessarily in time with the spoken words. I am not sure how I would modify that except to only use very few words and/or interpret off to the side while the video is being played.

However, in total I really think my kids would enjoy this, if for no other reason than the pictures move and sometimes even adding that much visual interest really helps things along.

Friday, April 5, 2013

Interactive Whiteboards part 2

At first, I thought I really would like interactive whiteboards. The tools seemed similar to powerpoint, or at least similar enough that I could adapt without too much difficulty. My experience, however, was not a positive one.

First and foremost, it took me three hours to figure out how to actually install the software, install it, and get the resource packs. In that time I could have run a half marathon, watched 3.4 episodes of Doctor Who, dyed my hair 3 times, or baked approximately 48 cupcakes.


Running a half marathon: approximately 2.5 hours
3 episodes of Dr. Who: 3.5 hours
Dyeing your hair 3 times: about 2.75 hours
Making 48 cupcakes: 2.55hours depending on bake time
ActiveInspire download with resource pack: 3 hours and tears


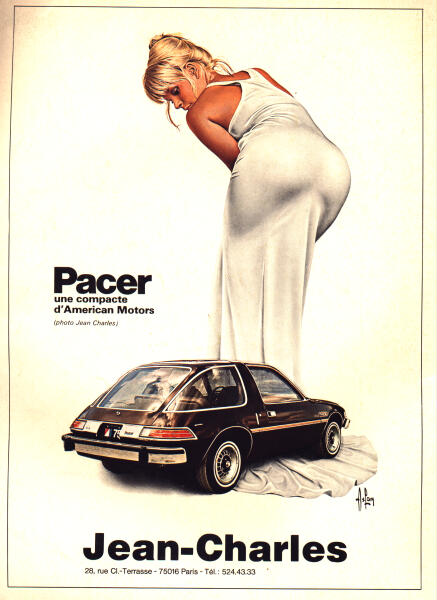
My next problem involved the user interface, which I find to be mildly frustrating at best and at worst an experience that brings me to tears. Typically, objects are sensitive to the actions of the user, but in the case of ActiveInspire, you can right click on something until the cows come home, but the software won't budge. Were this software a car, I would say that you have to slam on the breaks to slow down. However, you can only right-click with so much veracity. 


This is how you stop a car with bad brakes. This is also the force required to right click with the strength requisite to group objects in ActiveInspire.

My final complaint deals with the first two: what teacher would ever have the time to actually use tis program? It takes hours to assemble one of these flipcharts and moments to go through. Where is the pay-off. While I can see how this would be an incredibly useful software if my time were infinite and I did not have 300 papers to grade, that is just not the case. This could be a valuable teaching and review source were it not for the sheer time required to work it. 


Digital Diagram


I really liked this digital diagram software. I hope it's available where I wind up teaching. Going in, I had no knowledge of this software, and anything I had tried that resembled this project came from powerpoint. Powerpoint is great for a great many things, but awful for trying to move boxes and lines with any kind of precision. The outcome always looked like the product of a dizzy kindergartener playing on the computer, and a frustrated UT student.
imgres.jpg
What I attempt

IMG_2081.JPG.jpg
What I actually make


While I liked how this project would allow me to create my own diagrams and story boards for my kids (which in history class is so important! All those timelines!) I also really liked some of the pre-made templates. 
ComparingTechInventions_big.png
This is an example diagram of how technology impacts society. This is a state standard for 8th grade US history.


DeclarationofIndependence_bigbig.png
This diagram shows how to analyze a primary document, which is important to state standards at every grade level, but is a difficult thing for many kids to grab. 


I can see myself using these kinds of diagrams for many, many things. The first thing I can think of would be to make a timeline, as they are so helpful to give overviews of particularly knarly subjects. I could use pictures and attach notes to every picture, so that the kids can have a visual for every event. This is important with deaf ed; always have a visual. I could also see myself using this as an assignment to my kids. The only limitation would be that they cannot work on this at home. However, I definitely see that making something on this software would, for an older an/or advanced group, be a good group activity.